
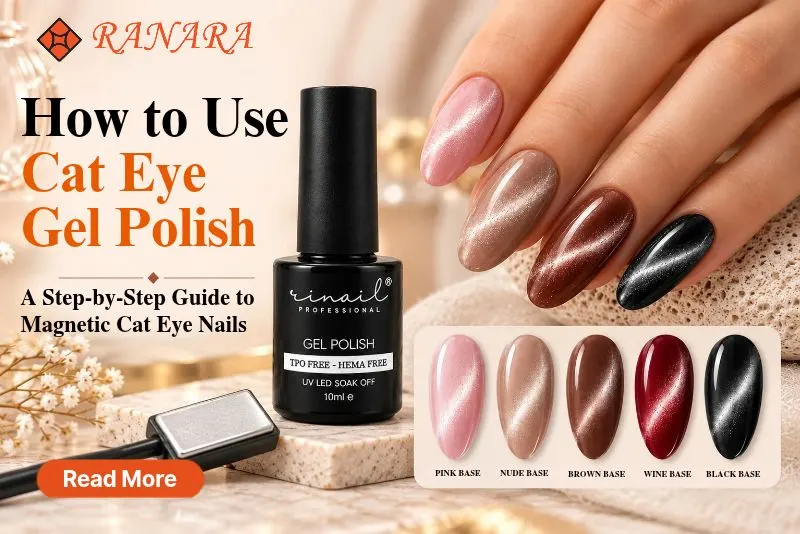
To use cat eye gel polish, apply it over a cured base colour, then hold a cat eye magnet close to the nail, without touching it, while the layer is still uncured, until the metallic particles form the line or pattern you want. Cure that nail straight away to lock the design in, then seal it with a top coat. The rest of this guide explains each step, how to choose and use a magnet, which base colours work, and how to fix common problems.
Cat eye gel polish, also called magnetic gel polish, contains fine metallic particles suspended in the gel. Without a magnet they sit evenly and look like a shimmer. With a magnet, they gather where the magnetic field pulls them, creating the glowing, shifting line that gives magnetic cat eye nails their name. The effect only holds because you cure the gel while the particles are in position.
What you need
- A cat eye gel polish (a magnetic shade, a nude, or a transparent overlay)
- A cat eye magnet
- A UV or LED lamp suited to your gel
- Base coat and top coat
- A cured colour gel if your polish needs a base
- Lint-free wipes and gel cleanser if your top coat requires wiping
- Gloves, if you work with uncured gel often
If you’re starting from scratch, Ranara’s Gel Polish range and the Cat Eye Magnet cover the main supplies.
How to use cat eye gel polish, step by step
- Prepare the nails. Shape, buff and cleanse as you would for any gel manicure. Keep gel off the skin and cuticle, because uncured gel on skin is a common cause of irritation.
- Apply base coat and cure. A classic base coat or another from the base coat range works the same as in a normal gel manicure. Cure as the product directs.
- Apply the base colour, if the polish needs one. See the next section on choosing it. Cure it fully before moving on.
- Mix the cat eye polish. Roll or stir the bottle so the particles are evenly spread. Settled particles are a common reason for a weak effect.
- Paint one nail only. Apply a thin, even layer. A very thick layer can make it hard for the particles to move. Do not cure.
- Bring in the magnet. Hold it close to the nail, without touching the polish, and keep it still or move it slowly until the pattern forms.
- Cure straight away. Cure that nail for the time your product and lamp require. Do not pass the magnet over it again once you are happy.
- Repeat nail by nail. Gel keeps levelling out while you wait, and the first nail’s design can blur if you leave it uncured while you work on the others.
- Apply top coat and cure. A gloss, matte or rubber top coat will change the finish, so test on a practice nail first.
If you don’t like the result before curing, wipe the gel off that nail and start again. Nothing is permanent until it goes under the lamp.
Check your bottle first. Curing times, lamp type and any base-colour requirements differ between brands and even between ranges. This guide covers the general technique. Where a product has its own instructions, follow those.
How to use a cat eye magnet
The magnet pulls the particles toward it, so where you place it decides where the shine appears. Some basic rules:
- Don’t touch the polish. Keep a small gap. How close works best depends on the magnet and the formula, so start close and adjust.
- Hold long enough. If the particles aren’t moving, the magnet may not have been in place long enough.
- Move deliberately. Dragging the magnet drags the particles, so lift it away cleanly once you’re happy.
- Don’t keep re-passing it. Repeated passes over the same nail can scramble the pattern.
- Use a magnet made for gel polish. Magnet strength matters far more than most beginners expect.
Ranara’s Cat Eye Magnet comes in six types, each described for a particular kind of effect:
| Magnet type | Effect described by Ranara |
| 2 Sided / Black 2 Sided | Straight lines from one end, bolder or diagonal pulls from the other |
| Pink Flower | Circular, blooming or spiral effects |
| Pen | Drawing patterns by dragging particles: swirls, stars, hearts |
| Round Bar | Gentle arcs, curves and halo effects |
| Beads | Starburst, dotted or spark-like effects |
For a first attempt, a 2 Sided magnet is the simplest way to learn the basic line and the diagonal.
Choosing a base colour for magnetic cat eye nails
There is no single rule that applies to every cat eye polish. The right base depends on what kind of polish you are using.
Opaque or strongly metallic cat eye polish. Ranara’s Cat Eye 9D Rinail is sold in ten shades (CE 9D-1 to CE 9D-10), and its product page states that a black base is required to get the best result. A dark base makes the line stand out against the particles.
Sheer, nude cat eye polish. Cat Eye Nude is a six-shade collection with a soft, subtle effect that suits everyday looks. The product page does not state a base requirement, so check your bottle or ask Ranara before choosing one.
Transparent cat eye overlay. Cat Eye All-in-One is described as a transparent polish with a silver sheen. It is meant to be applied over a colour of your choice: black, nude, pink, red, brown, wine and so on. The final look depends on the colour underneath, so one bottle can give you many different effects.
Magnetic cat eye nail designs to try
Classic line. Hold the magnet at one side or along the centre to pull a single band of light across the nail.
Diagonal. Angle the magnet to run the line corner to corner.
Halo or ring. Use a round magnet hovering at the centre to form a soft circle, then lift away cleanly.
Flower and star. The pink flower magnet and the pen magnet are meant for these shapes. Expect to practise, since these take more control.
French tip. Pull the particles to the free edge of the nail for a magnetic version of a French manicure.
Layered glow. Apply a transparent overlay over a coloured base so the colour shows through the shine.
Framed. Hover the magnet in the centre so particles gather there and leave a visible edge of the colour underneath.
Common mistakes and how to fix them
- Weak or faint line. The magnet may be too far away, too weak, or not held long enough. The polish layer may also be too thick.
- Pattern blurs before curing. Gel levels out over time. Work one nail at a time and cure promptly.
- Muddy colour. The base colour may be fighting the polish. Test combinations on a practice nail.
- Scrambled lines. You may have passed the magnet too many times. Wipe and redo.
- Particles won’t move. Stir the bottle thoroughly and check that the polish is still uncured.
- Design shifts under the lamp. Keep the magnet away from the nail once you’ve set the pattern, and cure immediately.
Safety and aftercare
Keep uncured gel off your skin and follow the safety instructions on each product. Cure with a lamp suitable for your gel and follow the cure times on the label. When it’s time for a change, remove gel polish carefully using Ranara’s guide to removing gel nail polish at home rather than peeling it off.
Conclusion
Using cat eye gel polish comes down to a few habits: choose the right base for your polish, keep the layer thin, hold the magnet close without touching, and cure each nail as soon as the design looks right. Start with a classic line using a simple two-sided magnet, then explore halos, florals and layered looks once you are comfortable. To get started, browse Ranara’s cat eye gel polishes and cat eye magnets.