
Table of Contents
- Why Gel Polish Is So Hard to Remove
- Checklist: What You’ll Need Before You Start
- Step-by-Step: How to Remove Gel Nail Polish at Home
- Removing Glitter Gel Polish
- Builder Gel vs. Gel Polish Removal
- Removing Gel Polish Without Foil
- Emergency Removal While Travelling
- Professional Gel Polish Remover vs. Acrylic Gel Remover
- Can Hand Sanitizer, Rubbing Alcohol, or Warm Water Remove Gel Polish?
- How Salons Remove Gel Polish (And What They Do Differently)
- Why Peeling Gel Polish Damages Your Nails
- Common Mistakes People Make
- Myths About Gel Polish Removal
- How to Restore Damaged Nails After Removal
- How Often Should You Wear Gel Polish?
- Signs Your Nails Need a Break
- Aftercare Routine
- Conclusion
Introduction
Gel manicures look flawless for weeks, but the moment you try to take the polish off yourself, things can go sideways fast. Peeling, picking, and prying at gel polish is one of the quickest ways to thin out and weaken your natural nails, and once you’ve done it a few times, your nails start to show it: they get brittle, ridged, and thin.
The good news is that removing gel polish at home is completely doable, and it doesn’t have to damage your nails at all, as long as you follow the right process and give the polish enough time to actually break down. This guide walks through the exact method nail technicians use, why each step matters, what to do if you don’t have foil or a dedicated gel remover on hand, how to handle glitter and builder gel, and how to nurse your nails back to health if you’ve already peeled a few times.
By the end, you’ll know exactly how to remove gel nail polish at home safely, and how to keep your natural nails strong in between manicures.
Why Gel Polish Is So Hard to Remove
Regular nail polish sits on top of the nail and dries through solvent evaporation, which is why a bit of remover and a cotton pad usually lift it off in seconds.
Gel polish is different. It’s a resin-based formula that goes through a chemical process called photoinitiated polymerization when it’s cured under a UV lamp or LED lamp. In plain terms: the light triggers a reaction that turns the liquid gel into a hard, cross-linked plastic-like layer that’s chemically bonded to itself and mechanically bonded to the surface of your nail plate. That’s why gel polish is scratch-resistant, chip-resistant, and glossy for weeks, and also why a cotton pad and regular remover barely make a dent in it.
To remove it, you’re not just dissolving a surface film. You’re breaking down a cured polymer, which only softens and lifts once it’s been exposed to a professional Gel Polish Remover or Acrylic Gel Remover that is specifically formulated to soften cured gel.
Checklist: What You’ll Need Before You Start
Gather everything before you begin so you’re not searching for supplies once you start the removal process. Having the right professional remover and tools ready makes gel polish removal quicker, safer, and gentler on your natural nails.
| Item | Why You Need It |
| Gel Polish Remover | Specifically formulated to soften and remove cured gel polish safely without excessive drying. |
| Acrylic Gel Remover (Liquid) | Designed to remove acrylic gel products and can also be used with the foil-wrap method for gel polish removal. |
| Coarse nail file (100/180 grit) | To gently break the top seal (top coat) of the gel. |
| Buffer block | To smooth ridges after removal. |
| Cotton balls or pads | Saturated with the remover and placed directly on the nail. |
| Aluminium foil (cut into small squares) | Holds the cotton pad in place and helps the remover work effectively. |
| Cuticle pusher (metal or wooden) | To gently push off softened gel, never to pry. |
| Cuticle oil | Essential for rehydrating nails after removal. |
| Hand cream or nail balm | Locks in moisture after removal. |
For professional nail care, it’s best to use a dedicated Gel Polish Remover rather than household acetone. Professional gel polish removers are specifically formulated to soften cured gel polish while being gentler on the natural nail plate.
If you’re removing acrylic gel or builder-type products, an Acrylic Gel Remover (Liquid) is recommended. It works with the same foil-wrap technique and is commonly preferred by professionals because it’s gentler on nails than acetone.
Ranara Nails offers both professional-grade removers designed for salon-quality results while helping maintain healthier nails during removal.
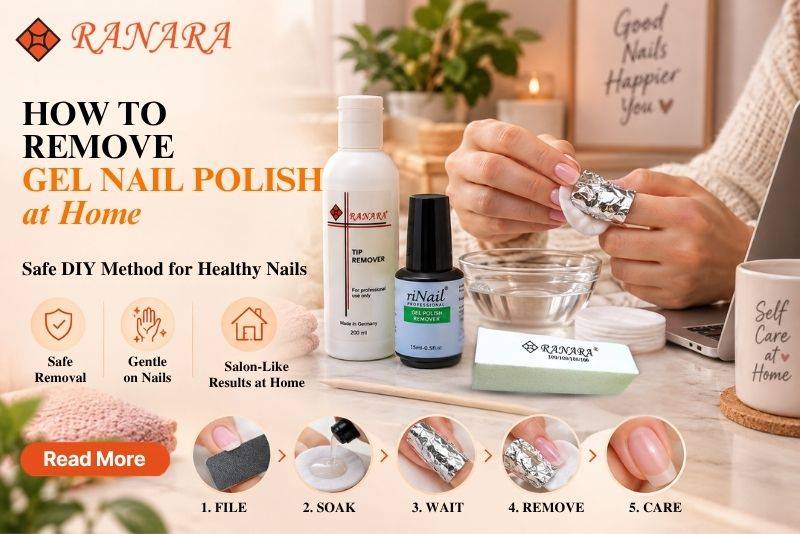
Step-by-Step: How to Remove Gel Nail Polish at Home
Step 1: Prep the Nail Surface
Using a coarse nail file, gently buff the shiny top coat off each nail. You’re not trying to file down to the nail; you just want to break the seal so the salon-quality gel remover can penetrate the cured coating more effectively. Skip this step and you can soak for 30 minutes with barely any results, because gel top coats are designed to resist exactly that kind of exposure.
Step 2: Protect Your Skin
Apply a thin layer of cuticle oil or petroleum jelly around your skin and cuticles. Gel removers can temporarily reduce moisture, so this helps protect the surrounding skin.
Step 3A: Apply Ranara Gel Polish Remover (For Gel Polish Only)
First, gently buff away the top coat to break the seal. Then apply a generous layer of Ranara Gel Polish Remover directly onto the gel polish using the built-in brush. Leave it undisturbed for 10–15 minutes until the gel polish begins to lift and bubble. Gently scrape away the loosened gel polish using a cuticle pusher or orangewood stick. Repeat if necessary.
Note: This method does not require cotton pads or foil wrapping.
Step 3B: Soak Off with Ranara Acrylic Gel Remover (For Acrylic Gel)
First, gently buff away the top coat to break the seal. Saturate a cotton pad with Ranara Acrylic Gel Remover (Liquid) and place it over the nail. Wrap each fingertip securely with aluminum foil to keep the cotton pad in place. Leave it on for 10–15 minutes, then gently remove the softened acrylic gel with a cuticle pusher or orangewood stick.
Step 4: Wrap Each Finger in Foil
Place the soaked cotton directly on top of the nail, then wrap a small piece of foil tightly around the fingertip to hold it in place. The foil does two important jobs: it keeps the remover in constant contact with the nail while trapping gentle warmth to improve effectiveness.
Step 5: Wait 10–15 Minutes
Set a timer. This is the step most people rush, and it’s the single biggest reason removal goes badly. Fully cured gel typically needs 10–15 minutes of continuous contact with the professional remover.
Step 6: Gently Push, Don’t Scrape
Remove one foil wrap at a time. Using a cuticle pusher, gently slide the softened gel off in one motion, starting from the cuticle area and moving toward the tip. If it doesn’t lift easily, don’t force it; rewrap that finger and soak for another 5 minutes.
Step 7: Buff Gently
Once all gel is off, lightly buff the nail surface to smooth out any unevenness. Go easy here: over-buffing thins the nail plate.
Step 8: Rehydrate Immediately
Massage cuticle oil into each nail and the surrounding skin, followed by a rich hand cream. Even professional removers can temporarily reduce moisture, so always finish by applying cuticle oil followed by a nourishing hand cream.
Removing Glitter Gel Polish
Glitter gel is notoriously stubborn because the glitter particles create texture that helps the polish grip the nail more aggressively, and multiple thin layers are usually applied to fully cover the glitter, meaning there’s more product to break down.
Tips for glitter gel:
- Buff more thoroughly before soaking: glitter often needs a slightly deeper initial file to expose enough surface area.
- Extend soak time to 15–20 minutes.
- Never pick at glitter polish with your nails or a sharp tool. It tends to come off in stubborn flecks, and people often end up gouging the nail plate trying to remove the last bits.
- If a few sparkly bits remain after the first soak, do a second short soak rather than scraping.
Builder Gel vs. Gel Polish Removal
These are often confused, but they behave very differently during removal.
| Gel Polish | Builder Gel (Hard Gel) | |
| Thickness | Thin, color coat only | Thick, structural layer |
| Removable with professional remover? | Yes | Usually requires filing first, followed by Acrylic Gel Remover (Liquid) for remaining product. |
| Recommended removal method | Soak-off method above | Mostly filed off by a professional, then a short soak using Acrylic Gel Remover (Liquid). |
| DIY-friendly? | Yes | Not recommended without training |
Builder gel is designed to be filed off, not soaked off, because it’s a much denser, non-soak-off formula used to add length or structure to the nail. Trying to remove builder gel with the same soak method used for gel polish is one of the most common at-home mistakes: it either doesn’t come off at all after 20+ minutes of soaking, or people over-file trying to speed things up, damaging the natural nail underneath. If you have builder gel or an acrylic overlay, it’s genuinely worth having it removed by a technician the first time so you can see how much filing is actually needed.
Removing Gel Polish Without Foil
Don’t have aluminium foil at home? You still have an effective alternative:
- Silicon Remover Caps: Saturate cotton pads with Gel Polish Remover or Acrylic Gel Remover (Liquid), place them over your nails, and secure them with reusable silicon remover caps. They help keep the remover-soaked cotton firmly in place while the gel polish softens.
Pro Tip: Whichever method you choose, avoid peeling or scraping the gel if it hasn’t softened completely. If needed, reapply the remover and leave it on for a few more minutes before trying again.
Emergency Removal While Travelling
If you’re away from home and need to remove your gel polish:
- Visit a nearby beauty supply store to purchase a Gel Polish Remover or Acrylic Gel Remover (Liquid).
- If a professional remover isn’t available, it’s best to wait until you can remove the gel properly rather than peeling or scraping it off.
- Avoid “quick fixes” like using a metal file to grind the gel polish off dry, as this can remove healthy layers of your natural nail and cause unnecessary damage.
Professional Tip: Keeping a travel-size Gel Polish Remover and a few cotton pads in your beauty kit can make safe gel removal much easier when you’re away from home.
Professional Gel Polish Remover vs. Acrylic Gel Remover
| Feature | Gel Polish Remover | Acrylic Gel Remover (Liquid) |
| Designed For | Removing cured gel polish only | Removing acrylic gel products and can also remove gel polish |
| Suitable Products | Gel polish | Acrylic gel, builder gel residue, and gel polish |
| Removal Method | Buff top coat, brush on remover, wait 10–15 min, gently scrape off. | Buff top coat, soak with cotton & foil, wait 10–15 min, gently remove. |
| Works on Gel Polish | ✔ Yes | ✔ Yes |
| Works on Acrylic Gel | ✖ No | ✔ Yes |
| Application Time | Approximately 10–15 minutes* | Approximately 10–15 minutes* |
| Professional Use | Ideal for regular gel polish removal | Ideal for acrylic gel services and versatile salon use |
| Recommended By Ranara Nails | ✔ Yes | ✔ Yes |
At Ranara Nails, we recommend using a remover specifically designed for the product you’re removing. Gel Polish Remover is formulated to safely soften and remove gel polish, while Acrylic Gel Remover (Liquid) is designed for acrylic gel systems and can also be used with the same foil-wrap method to remove gel polish. Using the appropriate professional remover helps achieve cleaner removal while supporting healthier natural nails.
Can Hand Sanitizer, Rubbing Alcohol, or Warm Water Remove Gel Polish?
Can hand sanitizer remove gel polish? Not effectively. Most hand sanitizers are alcohol-based (60–70% ethanol), which is far too weak to break down a cured gel polymer. You might see minor surface dulling with heavy rubbing, but it won’t lift the polish.
Can rubbing alcohol remove gel polish? Rubbing alcohol (isopropyl alcohol) is a stronger solvent than sanitizer but still isn’t strong enough on its own for fully cured gel. It can help soften a top coat slightly, but it isn’t a reliable substitute for a professional gel polish remover.
Can warm water remove gel polish?
No, but warm water can help prepare your nails before using a professional Gel Polish Remover or Acrylic Gel Remover (Liquid). Slightly warming your hands beforehand may help the remover work more effectively. Water alone cannot dissolve cured gel polish because it is designed to resist moisture.
How Salons Remove Gel Polish (And What They Do Differently)
Professional removal follows the same core science (file, soak, lift), but with a few differences that matter:
- Controlled filing: Technicians use an e-file or fine-grit hand file to remove only the top layer, judging pressure and thickness by feel, which minimizes over-thinning.
- Professional Removal Products: Salons use dedicated Gel Polish Removers or Acrylic Gel Removers depending on the service being removed.
- Consistent timing across all ten nails: Salons wrap all fingers at once and check every couple of minutes, rather than soaking unevenly.
- No prying: Technicians are trained to stop and re-soak rather than force a stubborn spot, which is the exact habit most DIY removals skip.
The main takeaway for home use: patience and technique matter more than strength. A salon isn’t using a secret ingredient; they’re just not skipping steps or rushing the soak.
Why Peeling Gel Polish Damages Your Nails
Because gel polish bonds mechanically to the surface of the nail plate, peeling it off doesn’t just remove color; it pulls away the top layers of the nail itself (the keratin layers) along with it. This is why nails often look thin, flaky, or ridged immediately after peeling off gel.
Repeated peeling over multiple manicure cycles can lead to:
- Nail plate thinning
- Increased breakage and splitting
- White patches or rough texture (keratin granulation)
- Slower nail growth due to ongoing surface damage
- Increased sensitivity when nails are exposed to water or products
None of this is permanent, since nails fully regenerate as they grow out, but it can take 3 to 6 months for a heavily peeled nail plate to grow out completely healthy again, since fingernails grow at roughly 3mm per month on average.
Common Mistakes People Make
- Peeling or picking gel off: the single most damaging habit.
- Not filing the top coat before soaking: makes the whole process take much longer.
- Rushing the soak time: leads to forcing and scraping, which damages the nail.
- Using household nail polish remover or unsuitable removal products instead of a professional Gel Polish Remover or Acrylic Gel Remover.
- Scraping with a metal tool like a knife or scissors instead of a proper cuticle pusher.
- Skipping aftercare: going straight into a new gel manicure without letting nails recover or moisturizing.
- Over-filing/buffing after removal to “smooth everything out” in one go.
- Ignoring pain or bleeding and continuing to remove polish anyway: this is a sign to stop immediately.
Myths About Gel Polish Removal
Myth: “Peeling gel off is fine as long as it comes off in one piece.” Even a clean, single-sheet peel takes surface nail layers with it. A satisfying peel isn’t a safe one.
Myth: “Leaving the remover on longer always works better.” Professional Gel Polish Removers and Acrylic Gel Removers are designed to work within the recommended soaking time. Leaving them on significantly longer won’t necessarily improve removal and may unnecessarily dry the surrounding skin. If the gel hasn’t softened, it’s better to rewrap the nail and repeat the process rather than extending the soak excessively.
Myth: “Gel polish makes your nails weaker permanently.” Gel polish itself doesn’t damage nails; improper removal does. Nails that are soaked and gently lifted, rather than peeled, generally stay healthy through repeated manicure cycles.
Myth: “Any nail polish remover will remove gel polish.”
Household nail polish removers are not formulated to effectively break down cured gel polish. Professional Gel Polish Removers and Acrylic Gel Removers are specifically designed for safe and effective removal.
How to Restore Damaged Nails After Removal
If your nails are already thin, peeling, or rough from previous removals, here’s how to help them recover:
- Cuticle oil twice daily: look for ingredients like jojoba oil or vitamin E, which help restore flexibility to a brittle nail plate.
- Keep nails short and filed in one direction to reduce splitting while they recover.
- Wear gloves for household chores, since detergents and hot water accelerate dryness in already-weakened nails.
- Avoid gel, acrylic, or dip powder until the nail surface looks smooth and even again.
- Consider a nail-strengthening base coat as a protective layer during the recovery period rather than skipping polish entirely.
How Often Should You Wear Gel Polish?
When gel polish is applied, maintained, and removed correctly by a trained nail professional, there is generally no need to take regular breaks between gel manicures. Contrary to popular belief, nails do not “breathe”—they receive nutrients through the nail matrix and surrounding tissue, while the cuticle area remains exposed even when gel polish is applied.
However, if the natural nail has become damaged due to improper application, aggressive filing, or incorrect removal, it’s best to avoid further gel applications until the damaged nail has completely grown out. Since fingernails typically take around 3–4 months to fully regenerate, this is the recommended recovery period before reapplying gel polish.
Signs Your Nails Need a Break
Watch for these signals that it’s time to pause gel manicures:
- Nails feel noticeably thinner or more flexible than usual
- Visible white or yellow patches on the nail surface
- Peeling in layers (onycholysis-like symptoms)
- Increased sensitivity or soreness at the nail bed
- Nails snapping or splitting more easily than before
If you notice ongoing pain, discoloration that doesn’t grow out, or signs of infection (redness, swelling, pus), see a dermatologist or nail specialist rather than continuing home treatments.
Aftercare Routine
A simple routine to follow after every gel removal:
- Wash hands with a mild, non-drying soap to remove any remover residue.
- Apply cuticle oil to each nail and massage in.
- Apply hand cream, focusing on nail edges and cuticles.
- Lightly buff any unevenness; don’t over-file.
- Leave nails bare for a few days if possible, or apply a strengthening base coat.
- Repeat cuticle oil application 2–3 times daily for the following week.
Conclusion
Removing gel nail polish at home isn’t complicated; it just requires patience and the right order of steps: break the seal, soak fully, lift gently, and rehydrate immediately afterward. The biggest damage comes from peeling, scraping, or rushing the removal process. For the healthiest results, professionals recommend using a dedicated Gel Polish Remover for gel polish and an Acrylic Gel Remover (Liquid) when removing acrylic gel products, followed by proper nail hydration.
Treat removal as part of your manicure routine, not an inconvenience to rush through, and your natural nails will stay strong through many gel cycles.
Explore Ranara Nails’ professional Gel Polish Remover and Acrylic Gel Remover (Liquid) to achieve salon-quality removal while helping keep your natural nails healthy.